8 Best Waterproof Tool Bags for Garden Care
The scent of crushed geosmin rising from a damp rhizosphere signals the start of the heavy labor season. When the turgor pressure in a developing seedling is at its peak, the margin for error in maintenance is razor thin. Efficiency in the field depends entirely on the accessibility and protection of high-carbon steel implements. Selecting the best tool bags for garden care is not a matter of aesthetics; it is a calculation of moisture barrier integrity and structural load bearing. A tool bag must withstand a constant barrage of ultraviolet radiation and high-humidity environments without compromising the internal dry-state of the equipment. If a bag fails to repel water, oxidation begins on pruner blades within hours. This guide analyzes the technical specifications required to maintain a professional-grade kit while ensuring the physiological health of the botanical specimens under your care.
Materials:

Substrate management is the foundation of any horticultural success. For a standard vegetable plot, aim for a **friable loam** with a **Soil Cation Exchange Capacity (CEC)** between **15 and 25 meq/100g**. This ensures the soil can retain and exchange essential cations like calcium and magnesium. The ideal soil pH for most intensive gardening is **6.2 to 6.8**. When preparing your beds, incorporate organic matter to achieve a **5 percent** total volume.
Specific NPK ratios must be tailored to the crop phase. For initial leaf development, a 10-5-5 ratio provides the necessary nitrogen for chlorophyll synthesis. As the plant transitions to reproductive growth, shift to a 5-10-10 or 4-12-12 ratio to prioritize phosphorus for root and flower development. The physical texture of the soil must remain porous to allow for gas exchange. If the soil becomes compacted, the oxygen levels in the root zone drop below 10 percent, leading to root senescence and anaerobic pathogen proliferation.
Timing:
Successful cultivation requires strict adherence to the Hardiness Zones defined by the USDA. In Zones 5 through 7, the window for spring planting typically opens when soil temperatures consistently reach 55 degrees Fahrenheit. Monitor the "Biological Clock" of your specimens. The transition from the vegetative stage to the reproductive stage is often triggered by the photoperiod, the specific duration of light and darkness in a 24 hour cycle.
For short-day plants, flowering begins when the dark period exceeds 12 hours. Long-day plants require the opposite. Precision timing involves tracking the last frost date with a 90 percent confidence interval. Planting too early results in cellular crystallization; planting too late subjects young tissues to excessive transpiration stress before the root system can compensate for water loss.
Phases:
Sowing
Direct sowing requires a seedbed with a fine tilth. Seeds should be planted at a depth approximately 2.5 times their diameter. Ensure the seed-to-soil contact is absolute to facilitate imbibition, the process where the seed absorbs water to activate metabolic processes.
Pro-Tip: Maintain consistent moisture to prevent the soil surface from crusting. A hard crust inhibits hypocotyl emergence, forcing the seedling to exhaust its endosperm energy reserves before reaching the light.
Transplanting
When moving starts from a nursery tray to the field, minimize root exposure. The delicate root hairs responsible for the majority of water uptake can desiccate in under 60 seconds of exposure to dry air. Dig a hole twice the width of the root ball to encourage lateral expansion.
Pro-Tip: Apply a dilute seaweed extract or mycorrhizal inoculant during transplanting. This encourages mycorrhizal symbiosis, a fungal relationship that increases the effective surface area of the root system by up to 100 times.
Establishing
During the first 14 to 21 days, the plant focuses on biomass accumulation. Monitor the apical meristem for steady growth. If the plant appears stunted, check for auxin suppression caused by mechanical damage or poor light quality.
Pro-Tip: Use a hori-hori knife to check for air pockets around the root zone. Eliminating these pockets prevents localized root death and ensures the plant can maintain the necessary turgor pressure to remain upright.
The Clinic:
Physiological disorders often mimic infectious diseases. Accurate diagnosis is essential for corrective action.
-
Symptom: Interveinal Chlorosis. The leaves turn yellow while the veins remain green.
Solution: This is typically a Magnesium deficiency. Apply a foliar spray of Epsom salts (magnesium sulfate) at a rate of 1 tablespoon per gallon of water. -
Symptom: Blossom End Rot. A dark, sunken leathery spot appears on the bottom of the fruit.
Solution: This is caused by a Calcium transport failure, often due to inconsistent watering. Ensure the soil moisture remains stable to facilitate calcium movement through the xylem. -
Symptom: Tip Burn. The edges of young leaves turn brown and crispy.
Solution: This indicates a Boron deficiency or excessive salt accumulation in the substrate. Flush the soil with 2 inches of fresh water to leach excess salts. -
Symptom: Nitrogen Chlorosis. Older leaves turn uniformly pale green or yellow.
Solution: Apply a high-nitrogen fertilizer with a 20-0-0 ratio to stimulate vegetative regrowth and restore chlorophyll levels.
Maintenance:
Precision maintenance is the hallmark of a master horticulturist. Plants require 1.5 inches of water per week, delivered at the drip line rather than the foliage to prevent fungal spores from germinating. Use a soil moisture meter to verify that the moisture has penetrated at least 6 inches deep.
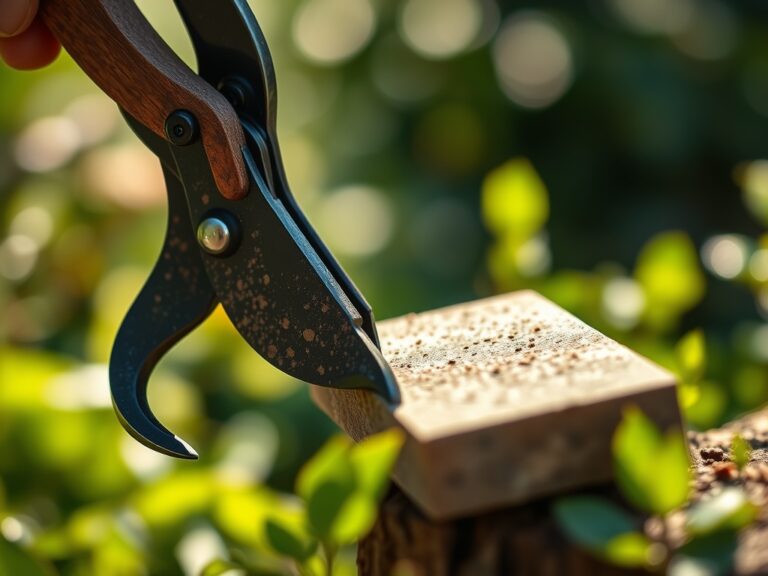
Keep your bypass pruners sharp; a dull blade crushes the vascular tissue, creating an entry point for pathogens. When removing diseased limbs, make the cut at a 45 degree angle to ensure water sheds away from the wound. Always sterilize tools with a 70 percent isopropyl alcohol solution between plants to prevent the spread of systemic viruses. Use your hori-hori knife for precise weeding, ensuring you remove the entire taproot of perennial competitors.
The Yield:
Harvesting is a race against senescence. For maximum nutrient density and shelf life, harvest leafy greens in the early morning when turgor pressure is highest and the plant is cool. For fruiting bodies, look for "abscission," the natural point where the fruit begins to detach from the stem.
Handle all produce with care to avoid bruising, which triggers the release of ethylene gas. Ethylene accelerates the aging process and causes rapid spoilage. Immediately after harvest, move the yield to a shaded, cool environment to remove "field heat." This reduction in temperature slows the metabolic rate of the harvested tissue, preserving the sugars and volatile compounds that define quality.
FAQ:
What material is best for a waterproof tool bag?
Look for 1680D ballistic polyester with a molded polypropylene base. This combination prevents moisture wicking from the ground and resists punctures from sharp tools like a hori-hori knife or specialized pruning saws.
How do I fix yellow leaves on my plants?
Identify the pattern of yellowing. If it is on old leaves, add Nitrogen. If it is interveinal on new growth, check for Iron or Manganese deficiencies. Always verify the soil pH first, as it dictates nutrient availability.
How much water do my garden plants actually need?
Most crops require 1 to 1.5 inches of water per week. Use a rain gauge to track precipitation and supplement as needed. Ensure water reaches the rhizosphere by irrigating slowly at the base of the plant.
Why are my tomato plants flowering but not fruiting?
This is often caused by temperature extremes. If nighttime temperatures exceed 70 degrees Fahrenheit or daytime temperatures exceed 90 degrees, pollen becomes sterile. Ensure adequate potassium levels to support the transition to the reproductive phase.