7 Steps on How to Prepare a Dedicated Nursery Bed for Growing Vegetable Cuttings
The crumble of good loam between your fingers, rich with the scent of decomposed organic matter and faintly sweet with humus, signals readiness for propagation work. That texture, somewhere between sand and clay with just enough give, creates the ideal environment for vegetable cuttings to establish robust root systems. Learning how to prepare a nursery bed for vegetable cuttings transforms scattered propagation attempts into a systematic production method that yields stronger transplants in half the time of traditional seed starting.
Most gardeners rush this foundational work, scattering cuttings into unprepared ground and wondering why rooting rates hover around 30 percent. A properly constructed nursery bed, engineered for drainage, aeration, and nutrient availability, pushes success rates past 85 percent while reducing maintenance to minutes per week. The difference lies in precision: pH calibration, particle size distribution, and microbial inoculation create conditions that trigger auxin production and adventitious root formation in days rather than weeks.
Materials and Supplies for Your Nursery Bed
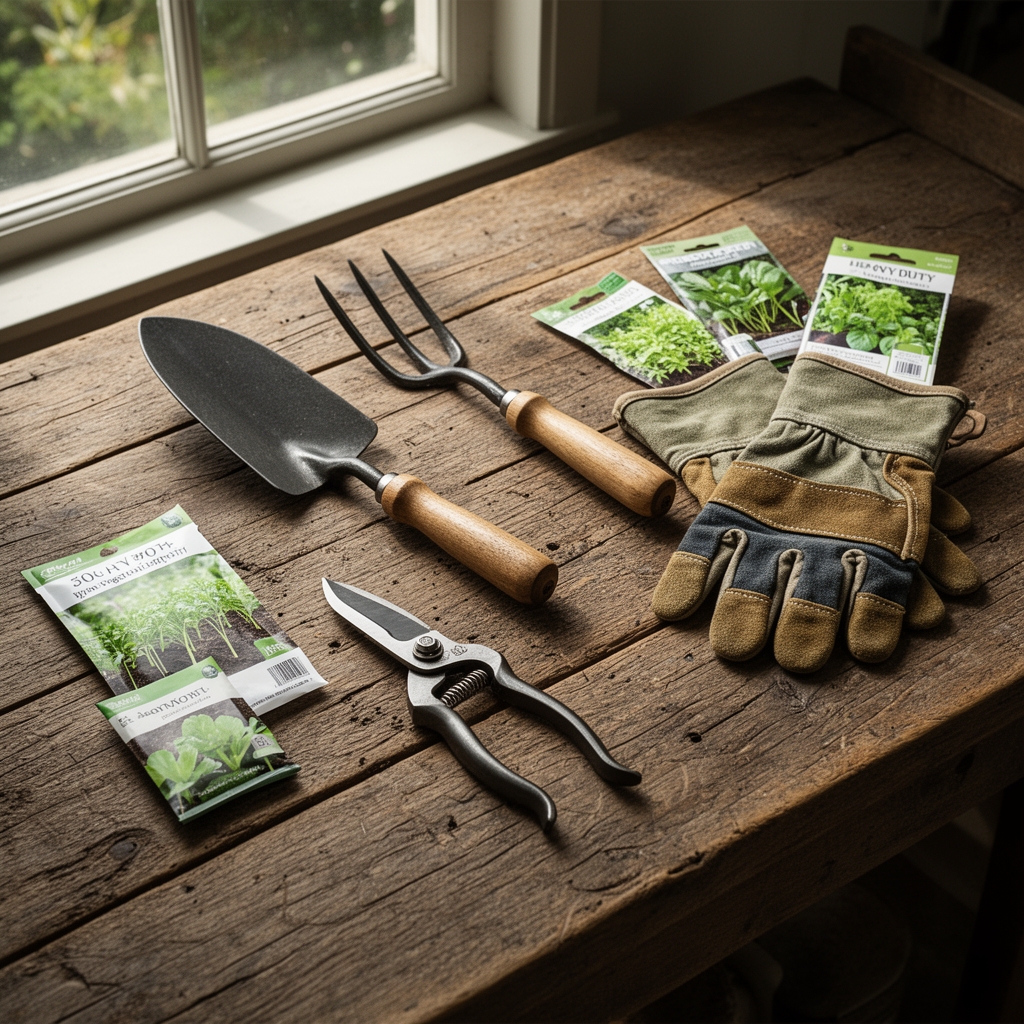
Soil Amendment Components:
- Coarse sand or perlite (3-5mm particle size): 30-40% by volume for drainage
- Aged compost (6+ months decomposed): 20-25% by volume
- Peat moss or coconut coir: 15-20% by volume for moisture retention
- Native topsoil (sifted through 1/4-inch mesh): Remaining volume
- Agricultural lime (dolomitic): 2-4 cups per 10 square feet if pH below 6.0
Fertilizer Specifications:
- Starter fertilizer with 5-10-5 NPK ratio: Apply at 1/2 strength (1 tablespoon per gallon)
- Bone meal (phosphorus source): 1 cup per 10 square feet for root development
- Mycorrhizal fungi inoculant: 1 ounce per 50 square feet to enhance nutrient uptake
Construction Materials:
- Untreated lumber (2×10 or 2×12 boards) for framing
- Galvanized screws or deck screws
- Hardware cloth (1/4-inch mesh) for bottom layer
- Shade cloth (30-50% density) for initial rooting phase
Tools and Testing:
- Soil pH meter or test kit (target range: 6.0-6.8)
- Broadfork or garden fork for deep loosening
- Garden rake for final grading
- Watering wand with fine mist setting
Timing and Growing Schedule
Hardiness Zone Considerations:
Zones 3-5: Prepare beds in late May when soil temperatures reach 55°F consistently. Zones 6-7: Begin preparation in mid-April for early summer propagation. Zones 8-10: Establish nursery beds in March or September to avoid extreme heat stress during rooting.
Rooting Timeframes by Vegetable Type:
- Herbaceous cuttings (tomatoes, peppers, basil): 7-14 days to visible root formation
- Semi-hardwood cuttings (rosemary, oregano, sage): 14-21 days
- Hardwood cuttings (fig, pomegranate): 28-45 days
Optimal Transplant Windows:
Start cuttings 4-6 weeks before your last frost date for spring crops. For fall production, initiate cuttings 8-10 weeks before first frost. This timing allows root systems to develop sufficient mass (minimum 2 inches of root length) before transplanting stress.
Season Extension Parameters:
In zones with fewer than 180 frost-free days, combine nursery bed preparation with cold frame construction. Transparent covers raise soil temperature by 10-15°F, extending viable propagation windows by 4-6 weeks on both ends of the season.
Step-by-Step Construction Instructions
Step 1: Site Selection and Excavation
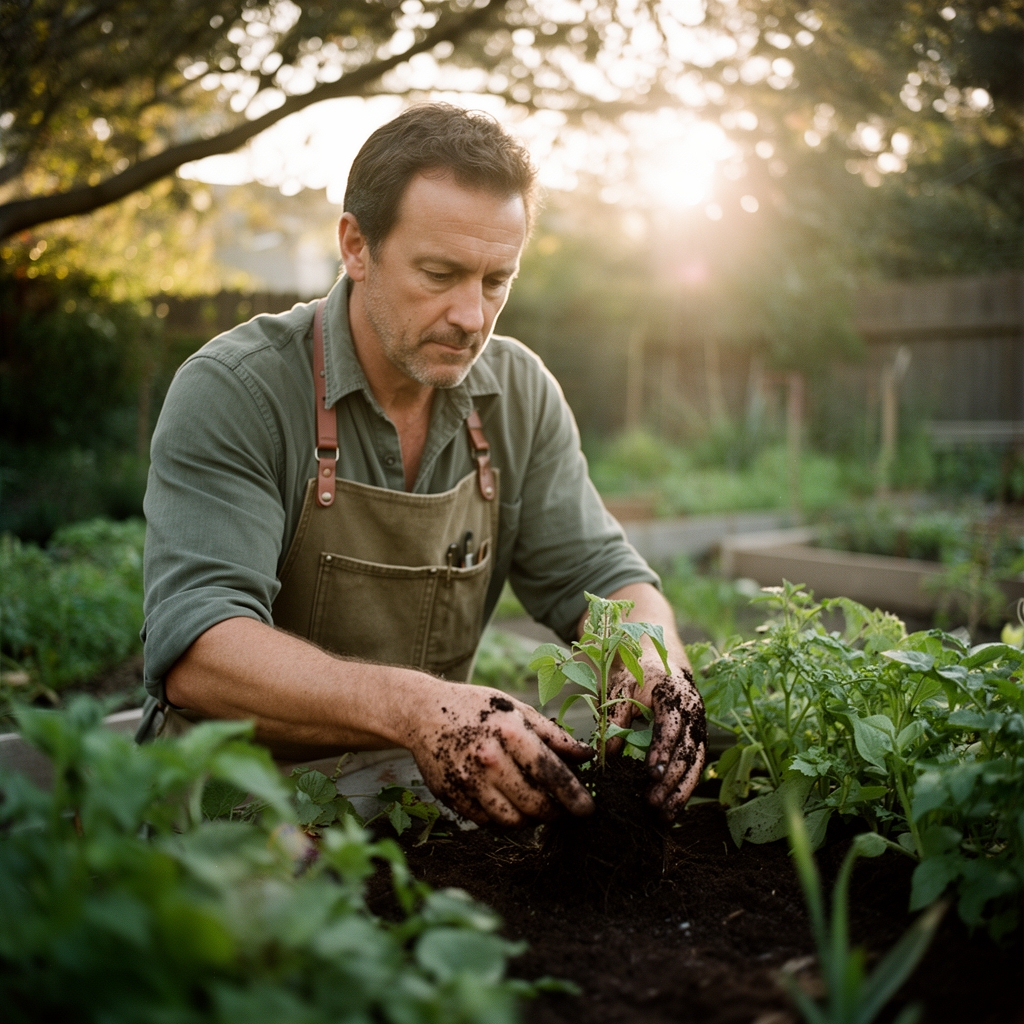
Choose a location receiving morning sun and afternoon shade (4-6 hours direct light). Mark out a 4×8 foot rectangle, the optimal size for arm's reach accessibility. Excavate to 12 inches depth, removing rocks, roots, and debris larger than 1 inch diameter.
Pro-Tip: Slope the bed floor 1-2 degrees toward one corner to create a natural drainage outlet, preventing waterlogged pockets that cause cutting rot.
Step 2: Install Drainage Infrastructure
Line the excavated floor with hardware cloth to exclude burrowing rodents. Add a 2-inch layer of coarse gravel (3/4-inch stone) across the entire base. This capillary break prevents water from wicking up too quickly while ensuring excess drains freely.
Pro-Tip: Place a perforated 4-inch PVC pipe along the lowest edge of the gravel layer, sloped to daylight drainage, creating a subsurface evacuation system for heavy rain events.
Step 3: Build the Frame
Construct a rectangular frame using 2×10 boards, creating a raised structure 10 inches above grade. Secure corners with 3-inch deck screws, predrilling to prevent splitting. The raised design improves soil warming by 5-7°F compared to ground level beds.
Pro-Tip: Coat the interior surfaces with raw linseed oil rather than chemical sealants. The oil penetrates wood fibers without leaching compounds that inhibit beneficial soil bacteria.
Step 4: Mix and Install Growing Medium
Combine your amendment components in a wheelbarrow or on a tarp, mixing thoroughly until distribution appears uniform. The target composition: 35% coarse sand, 25% aged compost, 20% coir, 20% sifted topsoil. Fill the frame to within 1 inch of the top.
Pro-Tip: Layer amendments in 3-inch lifts rather than dumping all at once, watering each layer lightly to eliminate air pockets that later cause uneven settling beneath cuttings.
Step 5: pH Adjustment and Testing
Test soil pH using a calibrated meter at five different locations, 4 inches deep. Most vegetable cuttings root optimally between 6.2-6.5 pH. If readings fall below 6.0, broadcast dolomitic lime at 2 cups per 10 square feet and incorporate to 6 inches depth.
Pro-Tip: Wait 48 hours after lime application before retesting. The neutralization reaction continues for two full days, and immediate retesting produces false low readings.
Step 6: Microbial Inoculation
Sprinkle mycorrhizal fungi inoculant across the bed surface at manufacturer's specified rate (typically 1 ounce per 50 square feet). Rake lightly to incorporate into the top 2 inches. These fungal networks colonize developing roots, extending nutrient acquisition range by 100-fold.
Pro-Tip: Inoculate on a cloudy day or in evening. Direct UV radiation destroys 40% of fungal spores within two hours of surface exposure.
Step 7: Initial Conditioning
Water the prepared bed thoroughly, applying 2 gallons per square foot to settle the medium. Allow 24 hours of drainage, then rake the surface smooth. Install shade cloth on a removable frame 18 inches above the bed surface, reducing light intensity by 40% during the critical first two weeks of rooting.
Pro-Tip: Add 1/4 inch of fine vermiculite as a surface topdressing. This layer maintains consistent moisture at the cutting base while reflecting light upward to basal leaf nodes, accelerating photosynthesis during root formation.
Nutritional and Environmental Benefits
Dedicated nursery beds concentrate propagation work into manageable space, reducing water consumption by 60% compared to scattered individual pots. The controlled environment allows precise nutrient management, delivering phosphorus for root initiation without excess nitrogen that promotes leafy growth at the expense of root development.
Mycorrhizal associations established in nursery beds transfer with transplants to final garden positions. These fungal partnerships increase phosphorus uptake by 300%, calcium by 150%, and improve drought tolerance through enhanced water acquisition. The investment in biological inoculation at the nursery stage pays dividends throughout the plant's productive life.
Vegetable cuttings rooted in properly prepared beds develop fibrous root systems with 40% greater surface area than seed-grown counterparts. This extensive root architecture accesses trace minerals (zinc, iron, manganese, boron) more efficiently, producing nutrient-dense harvests with measurably higher vitamin and mineral content.
The moist, organic-rich environment attracts beneficial insects including ground beetles (Carabidae family) that consume slug eggs and cutworms. Mason bees (Osmia species) nest in nearby hollow stems, providing pollination services when cuttings mature. This concentrated biodiversity creates a microhabitat supporting broader garden ecosystem health.
Advanced Methods for Maximum Efficiency
Small Space Adaptations:
Convert a 2×4 foot nursery bed into vertical propagation by installing three wire shelves above the bed surface at 18-inch intervals. Each level holds trays of cuttings, tripling production capacity. Provide supplemental lighting (6500K spectrum, 2000 lumens) on a 16-hour photoperiod for lower shelves receiving inadequate natural light.
Organic and Permaculture Integration:
Replace chemical fertilizers with compost tea applications: 5 gallons water, 2 cups finished compost, 1 tablespoon unsulfured molasses, aerated for 24 hours. Apply at 1:10 dilution weekly to introduce beneficial bacteria and protozoa that cycle nutrients and suppress pathogenic fungi.
Incorporate nitrogen-fixing cover crops (white clover, hairy vetch) between cutting rows. These plants establish quickly, fixing atmospheric nitrogen through rhizobial bacteria while providing living mulch that moderates soil temperature fluctuations.
Season Extension Techniques:
Install soil heating cables 4 inches below the surface, maintaining substrate temperature at 70-75°F regardless of air temperature. This 20-30°F differential accelerates rooting by 40% in spring and fall. Combine with cold frames for year-round propagation in zones 6 and warmer.
Apply transparent plastic mulch in early spring, two weeks before cutting insertion. This passive solar collection raises bed temperature to optimal range 10-14 days earlier than uncovered beds. Remove mulch once ambient temperatures stabilize above 60°F to prevent overheating.
Troubleshooting Common Nursery Bed Problems
Symptom: Cuttings wilt within 24-48 hours despite adequate soil moisture
Solution: Excessive light intensity causes transpiration rates exceeding water uptake capacity of developing roots. Increase shade cloth density to 60% or apply anti-transpirant spray (kaolin clay solution at 2 tablespoons per quart) to leaf surfaces. Mist foliage three times daily during the first week.
Symptom: Black rot appears at cutting base, stems detach easily
Solution: Fungal pathogens (Pythium, Rhizoctonia) thrive in waterlogged, poorly aerated conditions. Improve drainage by incorporating additional coarse sand (10% by volume). Reduce watering frequency to allow top 1 inch to dry between applications. Drench with hydrogen peroxide solution (1 tablespoon 3% per gallon) to suppress existing infection.
Symptom: Cuttings remain green but show no root development after three weeks
Solution: Insufficient phosphorus limits root initiation. Apply soluble fertilizer with 1-3-1 NPK ratio at half strength weekly. Ensure soil temperature remains above 65°F; install heating cables if necessary. Verify hormone application to cutting bases (IBA at 1000-3000 ppm for herbaceous species).
Symptom: Leaf yellowing progresses from lower to upper leaves
Solution: Nitrogen deficiency occurs in low-organic-matter mixes or excessive drainage that leaches nutrients. Top-dress with 1/4 inch aged compost and water with fish emulsion (1 tablespoon per gallon) biweekly. Confirm pH remains in 6.0-6.8 range; nutrient lockout occurs outside this window.
Symptom: Algae or moss covers soil surface
Solution: Persistent surface moisture from over-watering or inadequate air circulation. Reduce watering frequency by 30% and apply only when top 1/2 inch feels dry to touch. Improve ventilation by removing solid barriers within 3 feet of bed. Scratch soil surface lightly with a fork weekly to disrupt algal establishment.
Storage and Maintenance Requirements
Watering Protocol:
Newly inserted cuttings require consistent moisture without saturation. Apply 1/4 inch of water daily for the first week using a fine mist setting to avoid disturbing cuttings. Transition to 1/2 inch every other day during weeks 2-3 as roots establish. Mature cuttings ready for transplant need 1 inch per week, applied in a single deep watering to encourage deep root penetration.
Install a tensiometer at 4-inch depth to monitor soil moisture objectively. Maintain readings between 20-30 centibars during active rooting, allowing slight drying between waterings to stimulate root exploration.
Feeding Schedule:
Begin fertilization only after roots emerge from cutting bases (visible as white tips at soil line). Apply balanced liquid fertilizer (10-10-10 or 5-10-5) at 1/4 strength weekly for two weeks, increasing to 1/2 strength for the final two weeks before transplanting. This graduated approach prevents nutrient burn while supporting robust growth.
Alternate chemical fertilizers with compost tea applications to maintain diverse microbial populations. Beneficial bacteria populations decline by 50% under synthetic fertilizer programs compared to organic feeding strategies.
Seasonal Bed Rotation:
After transplanting the current crop, remove the top 2 inches of growing medium and replace with fresh compost. This practice eliminates pathogen buildup and replenishes organic matter consumed during the previous cycle. Test pH before each new planting season, adjusting as needed with lime (to raise) or sulfur (to lower).
Winter Protection:
In zones experiencing hard freezes, cover empty nursery beds with 6 inches of straw mulch to prevent frost heaving that disrupts soil structure. Remove mulch in spring once soil temperatures reach 50°F. The insulation maintains beneficial soil organisms in semi-dormant rather than frozen state, allowing faster reactivation.
Post-Harvest Cutting Storage:
Rooted cuttings ready for transplant but awaiting ideal planting weather can remain in the nursery bed for 1-2 additional weeks. Reduce watering by 40% and withhold fertilizer to slow growth and harden tissues. This acclimation period improves transplant survival rates by 25% compared to immediately moving vigorous, tender cuttings.
Success Blueprint Summary
A properly engineered nursery bed transforms vegetable propagation from unpredictable experiment to reliable production system, delivering 85%+ rooting success across dozens of species. The investment in quality materials, precise pH calibration, and biological inoculation pays compound returns through accelerated rooting, superior transplant quality, and established mycorrhizal partnerships that persist throughout the growing season. This dedicated infrastructure reduces maintenance time, concentrates resources efficiently, and produces stronger plants in half the time of conventional methods.
Share your nursery bed results and regional adaptations in local garden club meetings or online forums. Specific data on rooting rates, timeline observations, and variety performance helps fellow gardeners refine techniques for their unique microclimates and extends collective knowledge.
Expert FAQs
Q: Can I reuse nursery bed soil for multiple propagation cycles?
Yes, with proper amendment. Remove and compost the top 2 inches after each cycle to eliminate accumulated pathogens. Mix in fresh compost at 25% by volume and retest pH. Avoid reusing medium more than three consecutive seasons without complete replacement; beneficial microbial diversity declines and minor pathogens accumulate despite surface removal.
Q: What rooting hormone concentration works best for vegetable cuttings?
Herbaceous vegetables (tomatoes, peppers, basil) respond to IBA (indole-3-butyric acid) at 1000-2000 ppm. Semi-woody species (rosemary, lavender) require 3000-5000 ppm. Apply as powder directly to moistened cut ends or as 5-second dip in alcohol-based solution. Avoid rooting gels for nursery bed use; they create anaerobic conditions at the cutting base that encourage fungal infection.
Q: How deep should I insert vegetable cuttings into the nursery bed?
Insert cuttings to 1/3 their total length, typically 2-3 inches for most vegetable species. Deeper insertion increases rot risk in the buried portion. Ensure at least two nodes remain above soil level for photosynthesis. Remove all leaves from buried nodes to prevent decomposition that attracts pathogens.
Q: When should I transplant rooted cuttings to their final garden location?
Transplant when roots reach 2-3 inches length, typically 2-4 weeks after insertion depending on species. Gently tug the cutting; resistance indicates sufficient root development. Harden off for 7-10 days by gradually reducing shade and increasing exposure to outdoor conditions. Transplant on overcast days or in evening to minimize transplant shock.
Q: Do I need bottom heat for successful cutting propagation?
Bottom heat accelerates rooting by 30-50% but isn't essential for summer propagation when soil temperatures naturally reach 65-75°F. Consider heating cables for spring and fall cycles in zones 7 and colder. Maintain substrate temperature at 70-75°F, measured 4 inches deep. Excessive heat (above 80°F) increases pathogen activity and cutting mortality.