7 Natural Steps to Prepare a DIY Wood or Slate Plant Label
The smell of damp earth and the firm turgor of a healthy leaf define the success of a managed landscape. Proper identification is the backbone of botanical record keeping; without it, precision nutrient management becomes impossible. Learning how to prepare a DIY plant label allows a gardener to track specific cultivars and their unique physiological needs throughout the growing season. Accurate labeling ensures that a pH 5.5 acid-loving blueberry is never mistaken for a pH 7.0 neutral-soil shrub.
Documentation is the first step toward professional-grade horticulture. When you understand how to prepare a DIY plant label, you create a permanent record of the rhizosphere conditions and planting dates. This data prevents the accidental over-application of nitrogen in areas where senescence should be encouraged. A well-placed wood or slate marker serves as a technical data point in the field, bridging the gap between raw soil science and active garden management.
Materials:
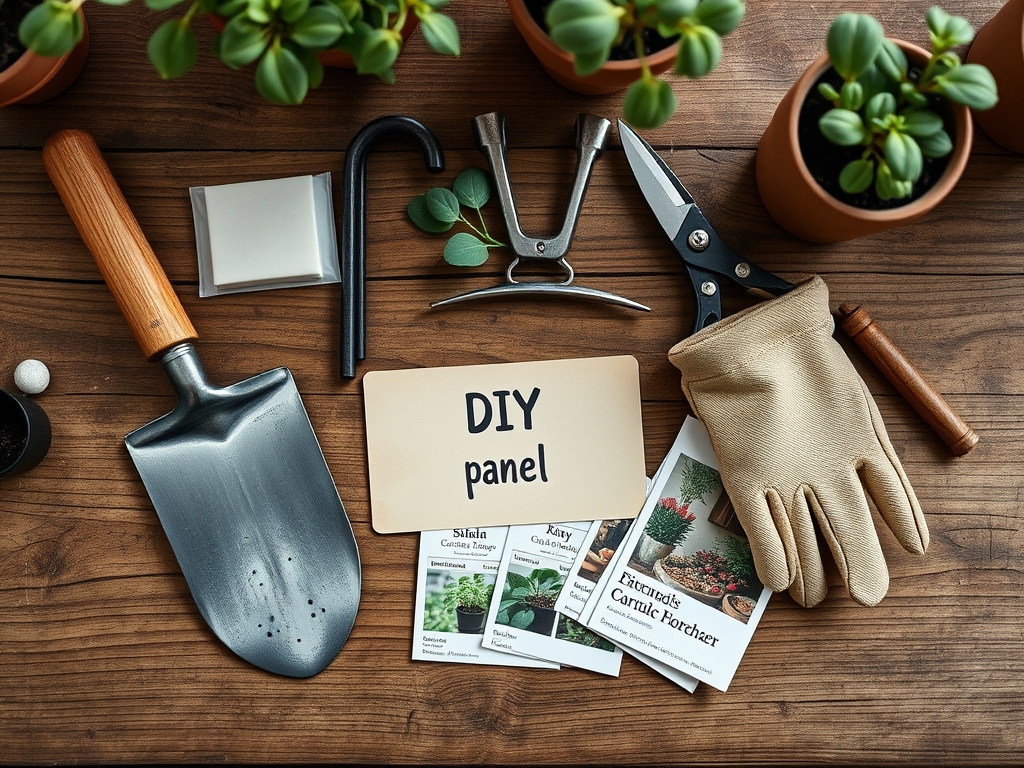
Selecting the substrate for your labels depends on the soil environment. For a **friable loam** with high organic matter, cedar wood is ideal due to its natural resistance to decay. If your soil has a high **Cation Exchange Capacity (CEC)**, slate is preferable as it will not react with concentrated mineral salts.
Materials list:
- Untreated Cedar or Grade-A Slate: Cedar provides a porous surface for ink; slate offers a non-reactive surface for grease pencils.
- Tung Oil or Beeswax: Used for sealing wood to prevent moisture ingress.
- White Paint Pen or Diamond-Tip Engraver: For permanent marking.
- Sandpaper (80 and 220 grit): To create a smooth surface for legible writing.
- Soil Moisture Meter: To ensure the label placement does not interfere with localized irrigation.
If you are labeling plants in a high-nitrogen environment (e.g., 10-10-10 NPK application), avoid metal labels that may oxidize. Stick to slate to maintain a neutral chemical profile near the plant base.
Timing:
Labels must be installed based on the Biological Clock of the specimen. In Hardiness Zones 5 through 8, the ideal window for labeling is during the transition from the dormant phase to the vegetative stage. This typically occurs 2 to 3 weeks before the last spring frost.
Timing the installation ensures that you do not disturb the soil during the critical root-flush period. For perennials, labels should be placed when the ground is workable but before the plant reaches peak turgor pressure in mid-summer. This prevents physical damage to the expanding foliage.
Phases:
Sowing and Initial Marking
Prepare the surface of the wood or slate by sanding it until it is smooth to the touch. For wood, apply a thin coat of Tung oil to prevent water from wicking into the fibers. Write the cultivar name and the planting date clearly.
Pro-Tip: Proper labeling during the sowing phase prevents the disruption of phototropism. If you know exactly where a seed is located, you can avoid over-mulching, which might block the light signals required for germination.
Transplanting and Label Placement
When moving a seedling into its permanent location, place the label on the north side of the plant. This prevents the label from casting a shadow over the meristematic tissue during the peak solar hours of the day.
Pro-Tip: Placing the label at a 45-degree angle away from the stem protects the mycorrhizal symbiosis occurring in the root zone. It ensures the stake does not sever the primary taproot or the delicate fungal networks that assist in phosphorus uptake.
Establishing and Maintenance
As the plant grows, the label must be adjusted to avoid auxin suppression. If a label is too close to the main stem, it can cause physical friction that disrupts the flow of growth hormones. Check the label every 30 days to ensure it remains legible and upright.
Pro-Tip: Maintaining a clear label allows for precise "spot-treatment" of nutrients. By knowing the exact variety, you can tailor your NPK ratios to the specific needs of the plant, such as increasing potassium for better fruit set in late summer.
The Clinic:
Physiological disorders often mimic nutrient issues. Use your labels to track these symptoms and their solutions.
-
Symptom: Interveinal chlorosis on young leaves.
Solution: This indicates an Iron deficiency, often caused by a pH above 7.0.
Fix-It: Apply chelated iron and update your label to reflect the adjusted soil pH. -
Symptom: Necrosis on the margins of older leaves.
Solution: This is typically a Potassium deficiency.
Fix-It: Top-dress with sulfate of potash at a rate of 0.5 lbs per 100 square feet. -
Symptom: Purpling of the underside of leaves.
Solution: Phosphorus deficiency, common in cold soils where microbial activity is low.
Fix-It: Use a high-phosphorus liquid fertilizer (e.g., 5-20-5) for immediate uptake. -
Symptom: Stunted growth with pale green foliage.
Solution: Nitrogen chlorosis.
Fix-It: Apply blood meal or a high-nitrogen synthetic fertilizer to restore chlorophyll production.
Maintenance:
A professional garden requires precise maintenance. Use a soil moisture meter to ensure the root zone receives exactly 1.5 inches of water per week at the drip line. Use a hori-hori knife to remove weeds around the base of your labels to prevent competition for nutrients.
Inspect your labels for signs of weathering every autumn. If using wood, a fresh coat of sealant may be required before the first hard freeze. If using slate, wipe away mineral deposits with a damp cloth to maintain legibility. Use bypass pruners to clear any low-hanging branches that might obscure the label or trap excess moisture against the marker.
The Yield:
For edible crops, the label is your harvest guide. Note the "Days to Maturity" on the back of the slate. Harvest during the early morning hours when turgor pressure is at its highest; this ensures the cellular structure of the fruit or vegetable is crisp.
Post-harvest, handle the plant with care to avoid bruising. For flowers, cut at a 45-degree angle and submerge immediately in cool water to maintain the hydraulic pressure within the stems. Your DIY label should be kept in place even after harvest to mark the location for future crop rotation strategies.
FAQ:
What is the best material for a DIY plant label?
Slate is the superior choice for longevity and chemical neutrality. It does not rot in high-moisture environments and resists UV degradation better than wood or plastic.
How deep should I drive the label into the soil?
Drive the label 3 to 4 inches into the substrate. This depth ensures stability against wind and heavy rain without interfering with the primary root mass or the rhizosphere.
Can I use permanent markers on wood labels?
Standard permanent markers will fade under UV exposure within 60 days. Use a paint-based pen or an engraver for a mark that survives the entire growing season.
How do I prevent wood labels from rotting?
Seal the wood with a natural oil or beeswax. This creates a hydrophobic barrier that prevents soil moisture from penetrating the fibers and encouraging fungal decay.